
Painting and Repairing Old Wood Siding—Step-By-Step
Here are the step-by-step procedures as discussed in our Painting and Stripping Old Wood Siding — Overview page.
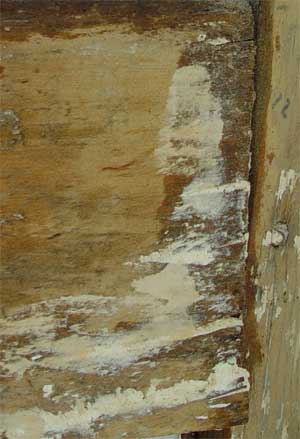
Remove the old siding. Carefully use a pry bar to remove the siding. Score the calk on the edges as the ends split easily. On our house, we found that a wire cutter was effective in grabbing the nail head and prying the nail out enough so a hammer could then remove it [Photo below].
Add house wrap. If you remove your siding, you have options to add insulation and house wrap which gives you just that much more protection. With wood siding, you should leave an air gap between the siding and the house wrap. For one side of the house, we used Benjamin Obdyke Home-Slicker-plus-Typar-Rainscreen.
For three of our house's sides, we saved the blown-in cellulose insulation. [Fiberglass versus cellulose]. We found that the blown-in cellulose would not fall out if only three boards were removed at one time. Therefore, we attached the house wrap at the top using staples and then stapled it down after three boards were removed.
Now strip the old paint. We have a separate page on what we did.
Next glue any cracks at the ends of the boards. On our boards that had plugs used after insulation was blown in, we removed the plugs and glued them back. For gluing we at first used used polyurethane glue (Gorilla glue) but switched to the more expensive Abatron LiquidWood. Do not use regualr exterior wood glue or a non-epoxy wood filler. These won't hold up.
Patch surface holes with an exterior wood filler. We ended up using an epoxy filler for all holes, large or small because they never failed. You want to use epoxy filler that has the same expansion properties as wood and doesn't shrink when it cures. We used Abatron WoodEpox. It isn't cost effective to use cheaper auto or marine epoxy fillers which can fail because they don't expand the same as wood.
Caulk cracks. We used GE Supreme Paintable Silicone Window & Door Sealant![]() Don't caulk the space between the bottom of the siding boards so that moisture from house can escape.
Don't caulk the space between the bottom of the siding boards so that moisture from house can escape.
Sand. Once any glue and filler have dried, use a belt sander with 100 grit sand paper to remove any paint residue and smooth the boards. You want to see fresh wood that will allow the upcoming waterproof coating to sink in.
Tip: Be sure to wear a dust mask, preferably a N110 rated mask.
Nail any loose boards. We removed the old cut nails from 1860 because they no longer gripped well. We replaced them with stainless steel siding nails. Prime exposed nails. If rusted, use the correct rust primer, or better, use a rust converter. Another option is to replace original nails with stainless steel nails.
Use paintable wood preservative. If your siding has been sanded so water is easily absorbed, it is worth applying a coat of paintable wood preservative. We used Wolman's Zinsser Woodlife Classic. Use an epoxy consolidant instead of the preservative where the wood has decayed. We painted all of our window sills with Abatron LiquidWood even though it is expensive. This provides excellent water protection and paint bonding for these flat surfaces.
Apply one coat of primer. We use Zinsser® Bulls Eye 1-2-3® PLUS Primer![]() primer. However, the Smith and Co's MultiWoodPrime epoxy primer looks worth considering.
primer. However, the Smith and Co's MultiWoodPrime epoxy primer looks worth considering.
Apply two coats of Home Depot's Behr Marquee Exterior![]() . Behr paints have been mentioned as a top paint in various consumer studies for many years. We use Consumer Reports
. Behr paints have been mentioned as a top paint in various consumer studies for many years. We use Consumer Reports![]() as our guide to paints.
as our guide to paints.
We are now using semigloss paint as it stays cleaner; however, some people do not like the glossy look.
Epoxy fillers and consolidants
Abatron's LiquidWood and WoodEpox![]()
These products restore rotted, severely damaged windows, columns, frames, broken furniture, structural and decorative wood components. They are especially valuable for parts that cannot be replaced because of size, shape or other reasons. The objects restored with these products become fully functional parts often stronger and far more durable than the original.
The consolidants (penetrants). Reinforces, rebuilds, water- and insect-proofs wood by hardening after penetrating. Regenerates rotted windowsills, frames, structural and decorative parts, furniture, boats, columns, floors.
Epoxy fillers are a structural adhesive putty and wood replacement compound. They are a high-strength no-shrink adhesive paste to fill, repair and replace wood and other materials in structures, walls, floors, furniture, sculptures. They are unaffected by water and insects.
Rot Doctor's Penetrating Epoxy and FILL-IT™ Epoxy Filler![]()
Primers
Wolmans WOODLIFE® Classic Clear Wood Preservative![]()
Smith and Co's MultiWoodPrime epoxy primer![]()
Help support this site
|

Remove nails first.The round circle is where a plug was installed after insulation was blown into the walls.
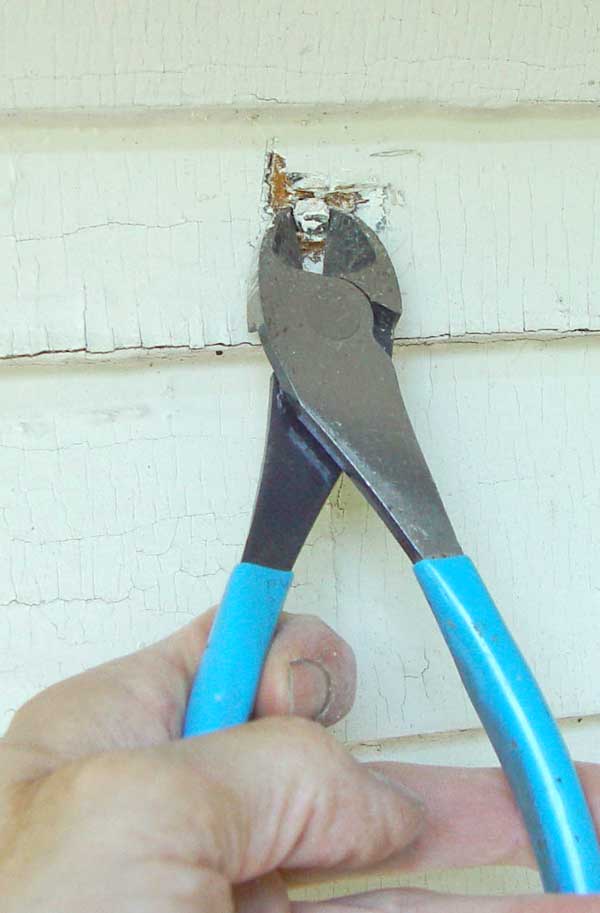
Pry out old nails with wire cutters.
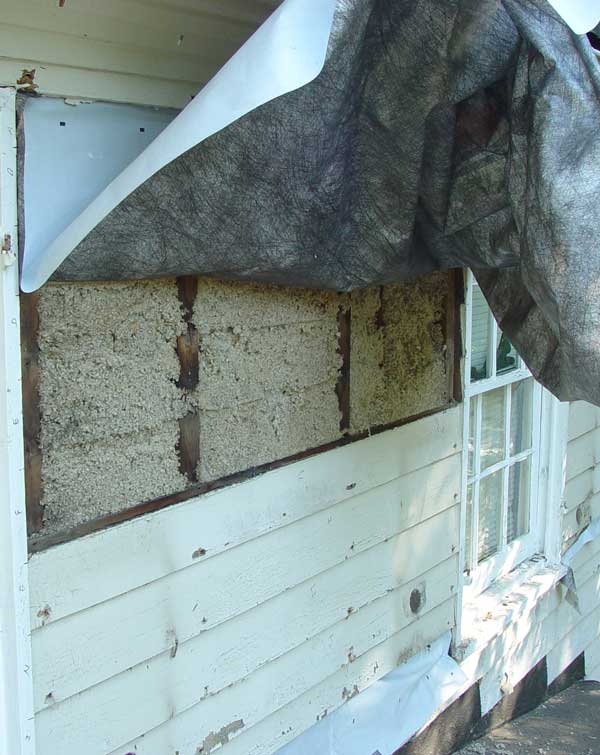
Stapling house wrap to cover blown in insulation.
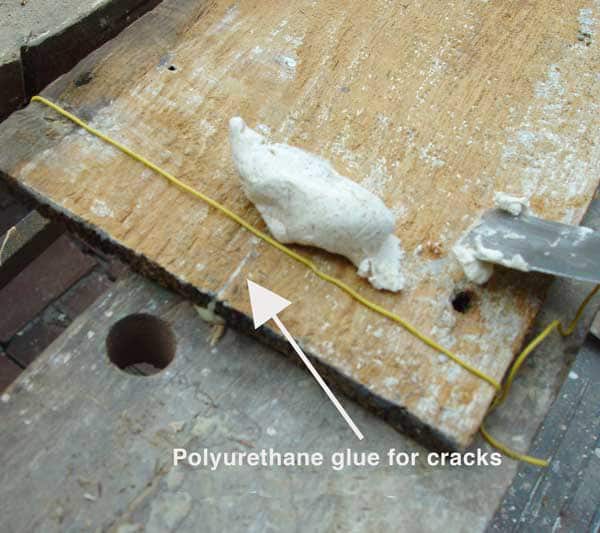
Gluing cracks and filling holes with an epoxy filler.
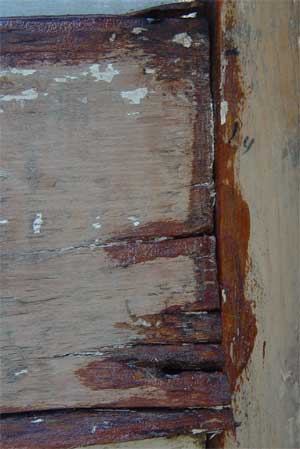
Board stabilized with liquid epoxy, e.g., on soft wood, cracks, and edges that will contact water.
Epoxy filler used for cracks and large holes.
- Don't let the primer sit more than a few weeks before painting. Soap-like compounds can form on oil primers in as little as two weeks.
- Use a brush when painting old siding. It allows the paint to be worked into the siding's imperfections more effectively than a roller or spray.
- Don't prime or paint in direct sunshine, when it is dry and breezy, or is very hot (over 90 degrees F)
- Paint should not be applied when the air temperature is below the stated figure for the product, nor if the temperature is forecasted to drop below that minimum during the next 24 hours, nor if the surface being painted is below that temperature: Oil-based paints should be applied when the temperature is at least 40 F; for latex paints, the temperature should be at least 50 F.
When pretreating the wood with a paintable water-repellent preservative (a recommended practice), best results are achieved if it is applied when temperatures are greater than 70 F. - Don't paint if it is too humid (between 20% and 80% is ideal). When water-based paints cure, the water should evaporate as fast or faster than the solvents. After the water has evaporated, the paint will shrink to nearly its final shape. As the solvents evaporate, the paint chemically reacts to form a hard material. When it is too humid, water cannot evaporate and the solvents may evaporate first, causing the paint to cure while still in a water-filled state. You cannot recover from this type of disaster. Oil-based paints will also fail if conditions are too humid.