
Repairing Old Wood Windows — Step-By-Step
Part 2: Glazing and Painting
Back to: Part 1: Removing Glazing and Paint »
There are different types of glazing compounds![]() that can be used to glaze windows. We use Sarco Seal putty as it glazes over much faster than Dap33 and is recommended by professionals. Glazing video
that can be used to glaze windows. We use Sarco Seal putty as it glazes over much faster than Dap33 and is recommended by professionals. Glazing video![]()
Average time to glaze a six pane window is about one and one half hours.
Dap 33 is easily found but takes about four or more weeks before it has a skin tough enough to be painted. It is also not recommended by professionals. Sarco Seal Dual Glaze or Sarco Mutiglaze Type M) is the putty of choice for many sash makers and window restorers. It can now be purchased in small quantities from Abatron or Smith Restoration Sash.
Note: I have been told that glazing putty shouldn't be kept for more than two years.
Expect that the glaze can take up to two weeks before it can be primed and painted. The reason being is that glazing hardens through oxidation, a slow process. More about glazing hardening
After the epoxy consolidant (see previous step-by-step) has dried for a least two days, it is time to reset the glass. Be sure to clean each glass pane with a glass cleaner before installing.
Apply a thin bead of putty to the frame. One method is to roll out a thin bead and place it on the frame. Make sure the bead is large enough so that the glaze squeezes out for a good seal.
If the glazing is cold, you can heat the glazing putty for about 20 seconds with a heat gun on low. Then press the glass into it. The idea is to seal the glass against the front of the frame. You should see the putty squeeze between the glass and the frame. Some will squeeze out of the back and can be cleaned up later.
Once the glass is tight against the glaze, insert the points. We had to cut down some of the points we bought as they stuck out too high and pushed through the mullion.
Small panes up to 12" can use 1 or 2 points per side, evenly spaced, adding 1 point for every 6 -8 inches. To insert the points, put one against the glass with the point down into the wood. Use your putty knife to wiggle-push the point down until it is seated at a height below the final height of the putty.
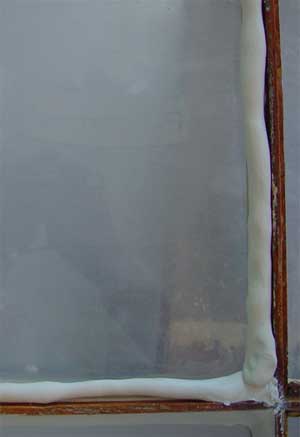
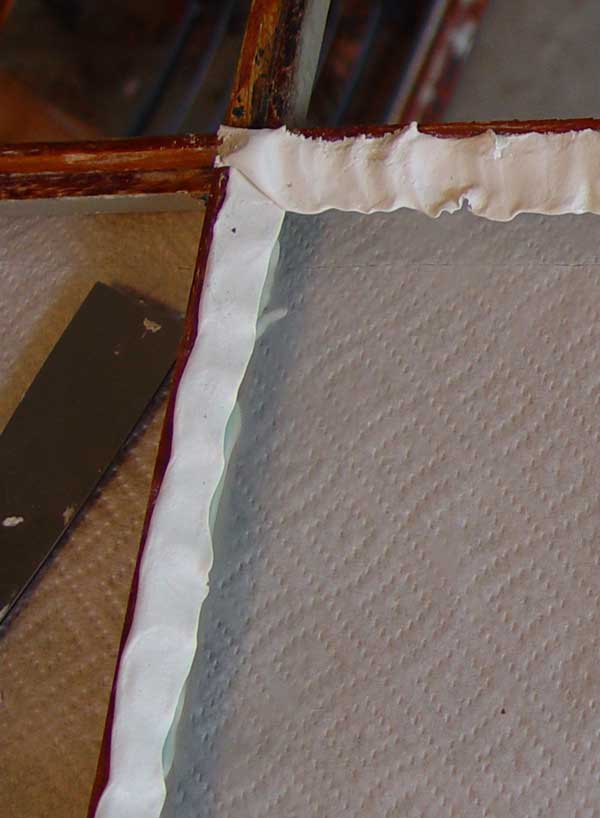
Trim the putty off the frame that has squeezed out the opposite side.
Be sure to use a small putty knife made for glazing, and make sure it is always clean.
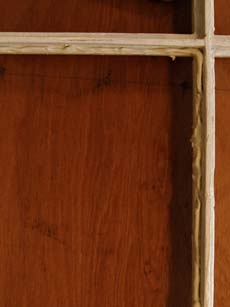
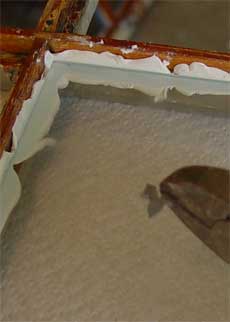
Remove a golf ball sized piece and warm it by rolling it in your hands. Then, press it into the frame against the glass, so that the groove is overfilled. Neatness doesn't count here. Once you have done all four sides, pick up your putty knife and, starting in any corner, glide the knife over the putty, pressing it firmly into the frame and cutting off the excess putty at the same time. Move slowly, with the knife at a deep angle to the frame. Use your fingers for smoothing.
The glazing must set a skin for at least 7 -14 days before you can prime and paint. The glass should be cleaned so that all of the putty oils are removed. It is important that in painting the glazing, the paint flows onto a small part of the glass to make a weather tight seal.
Painting
If you used the epoxy consolidant to coat your window, sand it to remove the gloss, and then paint with a good acrylic. A primer is not needed.
Since the primer and paint need to overlap the glass for a good seal, one method is to paint as close as possible on the glass and immediately wipe with a paper towel.
Use a good small brush to paint the glazing. I fond that the $10 brush was worth the cost.
Weather Stripping
Bronze weatherstripping
After painting, add bronze weatherstripping. Be sure to use brass nails. This stripping will hold up well for hundreds of years.
Attaching Weatherstripping
Cut bronze strips to just fit the sides of the window frame and the bottom of the window. The stripping should be positioned so the flange faces the outside of the widow (the fasteners are on the inside of the frame and widow bottom.
Using either brass nails, stainless steel nails, or stainless steel staples, put a fastener 1/3 away from each edge to align the weatherstrip. Then fasten with a nail or stable every two inches. You may need to punch nail holes with an awl if the strip does not come with pre punched holes.
Don't set the nails with the hammer. Drive nails in with a nail set. When the strip in fastened, run a putty knife or paint scraper down the strip's score line to push out the strip edge.
Weather stripping is available from Kilian Hardware or the HardwareHut. You may have to buy the brass nails (brads) separately if the nails shipped with the weatherstripping are brass plated steel which will rust. You can also attach the weather stripping with stainless steel staples.
Back to: Part 1: Removing Glazing and Paint »
|
Help support this site
|
Roll a small bead for the pane's bed.
Clipping a glazing point so it will fit the old window
Place rolled glazing around the glass.
Press the glazing in with your fingers.
The glazing removed with a putty knife
The final product
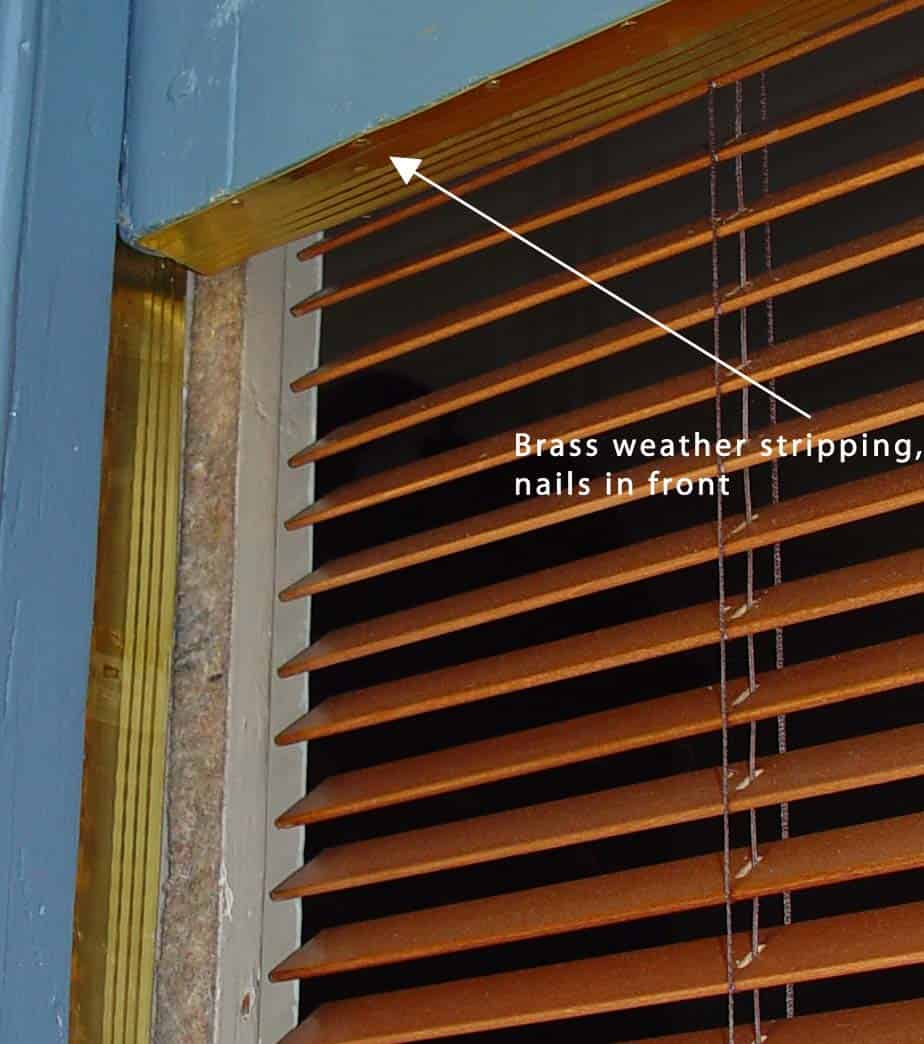
Brass weatherstripping